I'd like to start by saying if you need a bridal bouquet then congratulations are probably in order so...CONGRATULATIONS!
The popularity of diy brides seems to be rapidly rising and I hope this trend continues to grow. Making your own wedding necessities is not only satisfying but also very beneficial. The most important benefit is it makes your wedding YOURS. Your personality will be evident in every item you make. Your loving touch and creativity will be shared and appreciated by your family, friends and guests.
I know there are a plethora of bridal bouquet tutorials already available but I needed to make one anyway and thought you may want to join me. My son and his bride-to-be are getting married at a Renaissance Festival in September. The colors are purple and black.
I've included the butterfly embellishment in this tutorial. It's cute on the bouquet but it's also a keepsake. Once the wedding is over, the butterfly can be removed and used on a lapel, tote or anything you want.
This is my first attempt at making a bouquet of this type ( I've only made crochet and paper bouquets ) so sit back with a finely crafted ren fest root beer float and please ignore the cussing under my breath.
Materials and Tools:
*Crepe back satin in 3 different shades of purple - the satin is 60" long.
You need 16" wide of the 1st purple, 12" wide of the 2nd purple and 8" wide of the 3rd purple
*100% Polyester in light purple - 18" wide
*Cool wave pongee in deep purple - 8" wide
*Double faced satin ribbon 1" wide- 10"
*2 layer white and purple lace - 35"
*Wire - 16g - 20'
*Floral tape - 1 roll
*Sewing thread - any color
*Sewing needle
*Hot glue gun and glue sticks
*Wire cutters
*Pliers - any type
*Scissors
For the butterfly embellishment:
*Black polymer clay - a small amount
*Interference violet mica powder
*Micropearl mica powder
*Pin back
*20g silver wire - 6"
*16g wire - any color - 6"
*Round nose pliers
*A sheet of paper
Start by measuring 4" along the width of the crepe back satin. Make a snip in the fabric at the 4" mark and simply rip the fabric all the way down.
Fold your strip in half and cut it, you now have 2 strips measuring 4" wide by 30" long.
You will have a bunch of loose threads and an untidy edge you created by ripping the fabric. You can pull the threads out, cut them off, singe them off with a candle flame or ignore them. You can cut the untidy edges, singe the edges or ignore them. In the photo below, I am singeing the strings and frayed edges but I quickly switched to the ignoring method.
Using one of your strips, fold the top corner down at an angle.
With your threaded sewing needle, stitch from the top to the bottom of the folded point. Since I obviously have zero skills on explaining this, please refer to the photo below.
Now cut along the right side of your stitches, removing the extra bit of unwanted fabric.
Force the top of the fabric to line up with the bottom of the fabric and stitch them together all the way to the end.
Once you reach the end, cut off the extra bit of unwanted fabric and finish stitching.
Gather the fabric by pulling on the thread. Gather until the fabric measures 9" long then knot your thread and cut it.
Measure and cut a 10" piece of the 16g wire. Using your pliers, make a loop at one end of the wire.
This next step is optional and probably unnecessary but I like the added safety.
Lay the wire on the edge of your gathered fabric where you began stitching and stitch the wire to the fabric.
Now roll the fabric over the wire and stitch the fabric together along the edge of the wire. Knot your thread and cut it.
Apply hot glue to the bottom of the fabric where it's gathered and roll the fabric around itself.
Continue to apply hot glue and roll the fabric until you have glued all of the fabric.
Apply a dollop of hot glue around the base of the wire to keep it in place.
Wrap the wire stem with floral tape.
Again, this next step is optional and probably unnecessary but it makes me happy.
Cut a small square of fabric and snip a small slit in the center. Place the wire in the small slit and hot glue the fabric square to the bottom of the flower.
You have completed your flower. Using the 3 different shades of purple crepe back satin, make 7 flowers from one shade of purple, 6 flowers from a different shade of purple and 4 flowers from the last shade of purple.
Using the thin 100% polyester light purple fabric and the deep purple cool wave pongee, cut 3 strips from each color of fabric 4" wide by 22" long.
Follow the same instructions as above except instead of gathering the strips to 9", gather them to 7".
At this point, you should have a total of 17 large flowers and 6 small flowers.
Assemble your flowers into a bouquet.
Once you're satisfied with the color placement and shape of your bouquet, wrap the wires together with floral tape. Now decide the length you want for the handle and cut off the excess wire leaving an even, flat bottom on the handle.
Cut 2 small pieces of floral tape and cross them over the handle bottom concealing the exposed wires. Then starting at the top of the handle, wrap floral tape down to the bottom of the handle and back up to the top.
Cut a piece of the light purple 100% polyester fabric that measures 10" wide by 24" long. Fold the fabric in half so you have a measurement of 5" wide by 24" long and stitch the edges together along the long edge.
Once you have finished stitching, gather the fabric by pulling on the thread. This piece goes on the bottom of the bouquet so place it on the bouquet with the gathered edge wrapping around the handle. Now tighten the gathering until it fits well on the handle but is still loose enough to remove. Finish by sewing the 2 top corners together then knot the thread and cut it.
Remove the fabric from the bouquet and hot glue the sides together.
Cut the short white layer of lace off of the longer purple layer of lace until you have a 25 1/2" piece of purple lace.
Fold one end of the lace over approximately a 1/4". Stitch the lace to the back side of the bouquet bottom making sure your stitches do not go through the top layer of the bouquet bottom. You can hot glue the lace if you'd prefer. Once you come to the end, fold the end of the lace over approximately a 1/4" and finish sewing the lace on. Knot your thread and cut it. Hot glue the 2 ends of the lace together.
Using the double face ribbon, wrap the bouquet handle.
Place the bouquet bottom on the bouquet and stitch it around the bouquet, attaching it to the bottom row of the flowers without allowing your stitches to show. Again, you can hot glue the piece on if you'd prefer.
Stitch along the top of the 2 layer lace, gathering it as you go and testing the fit around the bouquet handle. Once the gathered edge of the lace fits nicely around the bouquet handle, cut the excess lace off and knot the tread going through both sides of the lace. Hot glue the ends of the lace together.
Insert the bouquet handle into the center of the lace circle. Apply hot glue around the top of the handle and press the lace into the glue.
Stitch down the center of the double face ribbon pulling the tread tight to gather.Continue to stitch and gather until the ribbon fits around the top of the handle. Cut off the excess ribbon and knot your thread, stitching through both sides of the ribbon. Cut the thread and hot glue the the ends of the ribbon.
Slip the gathered ribbon onto the bouquet handle. Apply glue around the handle and press the ribbon into the glue.
Your bouquet is finished!
Let's make the butterfly pin.
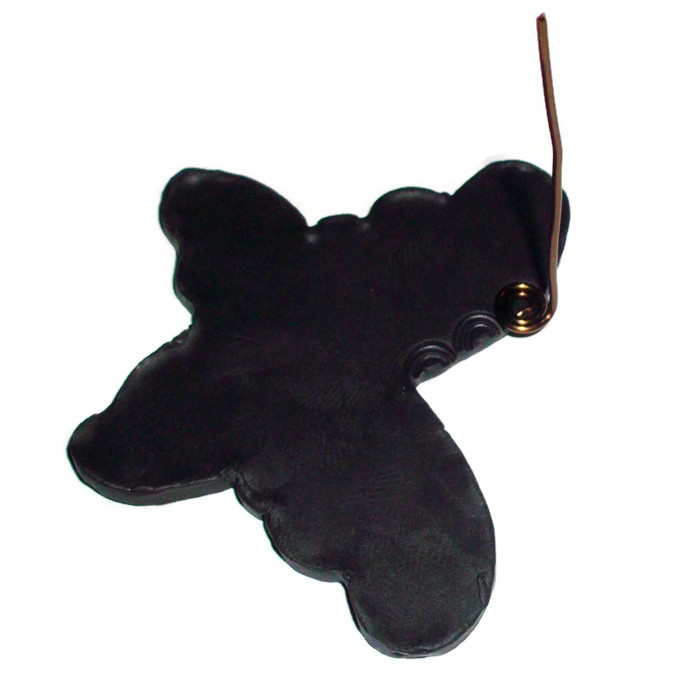
Cut 2 - 3" pieces of the 16g wire. Using your round nose pliers, make a closed spiral on one end of a wire and bend the other end upwards to create a handle. Repeat with the other piece of wire but make an open spiral. Ignore the heart shaped wire in the photo.
Draw a butterfly shape on a sheet of paper and cut it out to use as a template. If you'd rather not draw a butterfly, you may enlarge and print my butterflies below. I selected the top left butterfly for my pin.
Run your black polymer clay through the thickest setting on a pasta machine or just roll it out to the thickness you want. Place the butterfly template on your clay and cut around it. Smooth the edges of the butterfly with your fingers.
Using the closed spiral tool you made, press half of the spiral around the outside edge of the butterfly.
Using the open spiral tool you made, press it all over the top of the butterfly.
Roll a small amount of clay into a snake. Separate the top and bottom of the pin back. Wrap the clay around the pin section of the pin back and place it on the back of the butterfly. Smooth the clay onto the butterfly.
Use a small piece of clay to form a butterfly body. Fold the 6" piece of 20g wire in half and press it onto the back of the body.
Using your finger, rub micropearl mica powder on the butterfly body.
And interference violet mica powder on the wing section.
Press the body onto the center of the wing section. Shape the wings to your liking and bake the butterfly as directed on the clay package.
Using the round nose pliers, spiral the wire "antennas".
Place the butterfly on the bouquet and secure it with the top piece of the pin back.
All done!
After I made this bouquet, I made 2 bridesmaids bouquets and a flower girl bouquet.
My son and his fiancee are expecting a baby girl in July so I also made her a tiny bouquet and a crochet Tinkerbell outfit.
Bride's bouquet
Bridesmaid bouquet
Bridesmaid bouquet
Flower girl bouquet
Tinkerbell outfit
If you want the pattern for this amazingly cute outfit, it's available at
Knitsy Crochet on Etsy. Here's a direct link to the
Tinkerbell outfit. I replaced the sweet pom poms for flowers because it's being worn at a wedding.
Tinkerbell outfit with the tiny bouquet
If you are here because you're planning your wedding, I wish you a beautiful, memorable wedding followed by many, many happy years of marriage!
As always, thank you for visiting.