


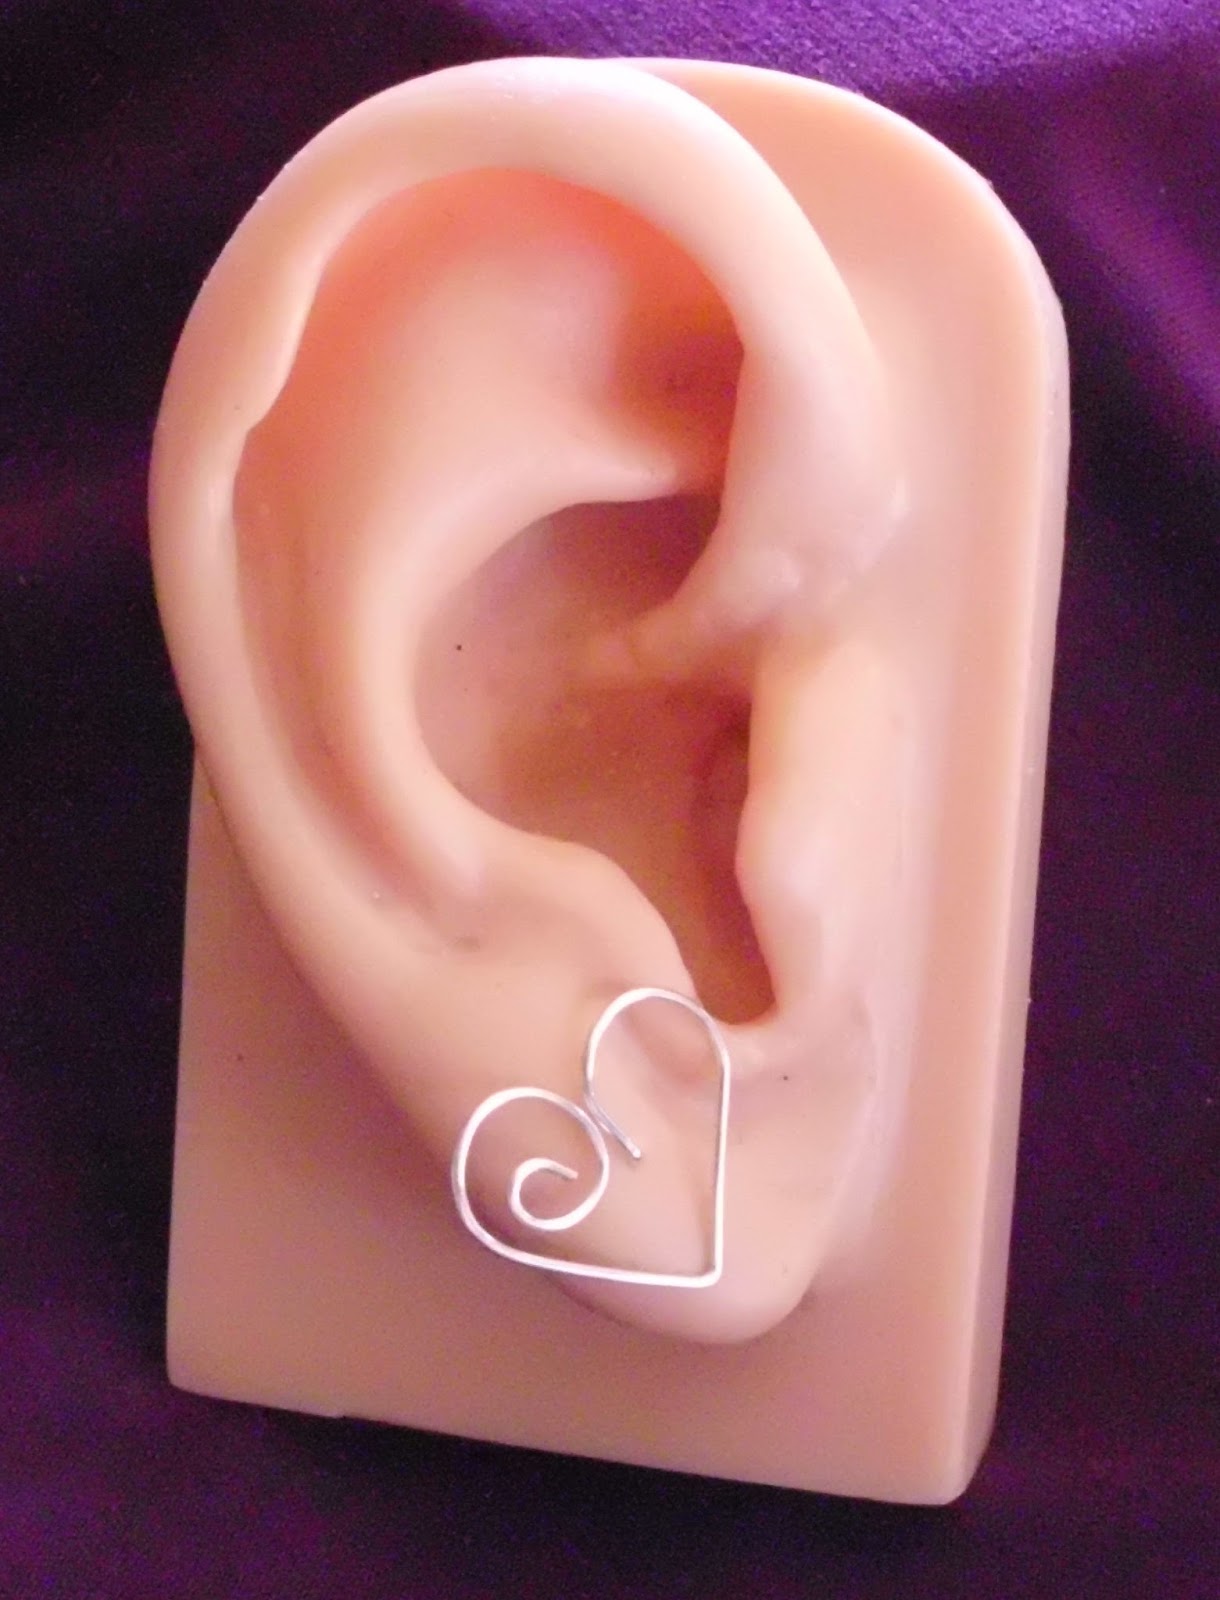
These sweet little earrings are perfect for Valentine's Day but the classic shape is also perfect for anytime.
You can easily customize these earrings by adding beads or crystals, make them larger or smaller, change the wire color or make the swirled side more or less swirly.
In case you want to make your earrings exactly like mine, I am including all the measurements.

Tools and Materials:
22g Silver wire - I used Parawire
Step bail making pliers - You can also use round nose pliers
Nylon jaw pliers
Wire cutters
Flat nose pliers
File or emery board
2 stud earring backs
The earrings measure 5/8" wide x 5/8" long.

Cut 2 - 4" pieces of wire.
Measure 1" from the end of your wires and place them on the 4th step of the bail making pliers at that 1" mark. Wrap the wires around the pliers creating a U shape.

Place the flat nose pliers 1/4" down from the top of the curve and bend the short wire straight back, this is the ear post. Make sure you bend the wire back on the opposite side of the second earring.

Working on the long wire now, measure 5/8" down from the top of the heart and make a sharp bend using flat nose pliers. Measure 1 1/2" from the bend and cut the excess wire. File the end of the wire removing the sharp bits. Repeat on the opposite side of the second earring.
Using the smallest step of the bail making pliers, curl the long wire inwards to meet the first top of the heart. Repeat for the second earring.

Cut the ear posts at 1/2" and file.

Place the earring backs on the posts.
And...you're done!
Final thoughts - You will notice my earrings aren't exactly the same and I'm okay with that. However, if you are a perfectionist or are making these earrings to sell, the earrings can be held together through the entire process. This will accomplish an exact mirror opposite.
